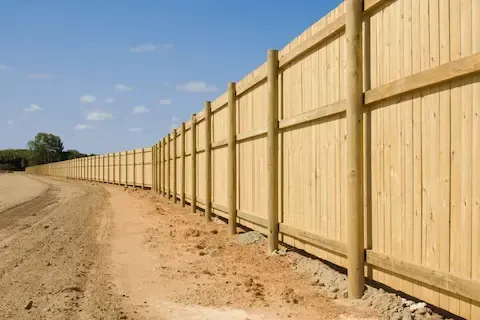
Setting Wood Fence Posts in Abilene Texas Clay Soil
Setting wood fence posts in Abilene's clay soil requires specific techniques to prevent heave, leaning, and rot. Taylor County's expansive Vertisol clay swells when wet and shrinks when dry, creating relentless lateral pressure on any post set without proper preparation. The right approach combines a bell-bottom hole, a gravel drainage base, and a concrete collar that sits slightly above grade. Done correctly, your posts stay plumb through years of West Texas weather cycles. Skip any one of these steps and you will be resetting posts within three to five years.
Step 1: Dig the Hole to the Right Depth and Shape
In Abilene's clay-heavy soil, depth is your first line of defense. Dig post holes to a minimum of one-third the total post length below grade. For a standard six-foot privacy fence using eight-foot posts, that means at least 24 to 30 inches deep. More critical than raw depth is the bell-bottom shape. Use a clamshell digger to create the initial cylinder, then flare the base outward with a hand tamper or a rented post hole auger with a flaring attachment. The widened base — typically three to four inches wider in diameter than the shaft — locks the post against the vertical heave that Taylor County clay produces after heavy spring rains. Do not skip the bell. It is the single most effective structural improvement you can make at no extra material cost.
Step 2: Set a Gravel Drainage Base
Clay does not drain. Water sits at the bottom of a post hole in Abilene soil and accelerates both rot and frost-related movement during winter cold snaps. Before setting any post, pour four to six inches of coarse gravel — three-quarter-inch crushed limestone or pea gravel both work well — into the bottom of the bell. Tamp it level. This layer gives water somewhere to go instead of pooling around the post base. It also keeps the end grain of the wood off direct soil contact, which meaningfully extends post life in the humid summers Taylor County experiences along creek drainages near Elm Creek and Lytle Lake. Do not use fine sand. Fine sand compacts into an impermeable layer in clay and defeats the purpose entirely.
Step 3: Choose and Set the Right Post Material
For West Texas conditions, pressure-treated pine rated at a minimum of 0.40 pounds per cubic foot retention is the practical standard for ground-contact applications. Cedar is a reasonable alternative if you prefer a natural option, though it costs more and performs best above grade. Whatever species you choose, char the bottom 18 inches of the post with a propane torch before setting it. This traditional technique closes the wood grain against moisture absorption and adds measurable years to in-ground life without chemicals. Set the post in the hole, resting it on the gravel bed, and brace it plumb using two 2x4 kickers staked at 90-degree angles to each other. Confirm plumb with a level on two perpendicular faces before you mix any concrete.
Step 4: Mix and Pour the Concrete Collar Correctly
Standard 60-pound bags of fast-setting concrete — Quikrete or equivalent — work well for post setting in Abilene's conditions. For each post hole, calculate roughly one bag per foot of hole depth in a standard six-inch-diameter hole. In clay soil, the concrete collar serves a different purpose than it does in sandy or loam soils: it acts as a stabilizing anchor resisting lateral movement, not just a vertical anchor. Pour the dry mix directly into the hole around the post, then add water slowly from a garden hose per manufacturer instructions. Do not mix in a bucket and pour. Dry-pour method allows the concrete to draw moisture evenly from the surrounding clay as it cures, which actually improves bond in high-clay environments. Slope the top of the finished collar slightly away from the post — about a half-inch crown — so surface water sheds away rather than pooling at the wood-concrete interface. This detail prevents the single most common source of post rot in Taylor County fence installations.
Step 5: Allow Proper Cure Time Before Loading the Post
Fast-setting concrete reaches working strength in 20 to 40 minutes and adequate structural strength within 24 hours under normal Abilene summer temperatures. However, do not attach fence panels, rails, or gates within the first four hours, and avoid any heavy lateral loading for a full 24 hours. In cooler months — November through February in West Texas — extend that window to 48 hours. Clay soil insulates the concrete base from temperature extremes, which can slow cure in cold weather. Rushing this stage is one of the most common mistakes homeowners make during weekend fence projects. The bracing you installed in Step 3 stays in place until the concrete has fully cured. Removing it early transfers load to uncured concrete and allows posts to shift before the collar has bonded to the surrounding clay walls.
Step 6: Inspect and Adjust for Seasonal Movement
Even correctly set posts in Abilene experience minor seasonal movement as Taylor County's clay cycles through wet and dry phases. Plan a walk-along inspection each spring after the heavy rain season and again in late fall before winter. Look for posts that have tilted more than one degree off plumb, concrete collars that have cracked along the post interface, or rail connections that have pulled loose. Catching movement early means a brace and a partial re-pour rather than a full replacement. For ongoing maintenance context, our spring staining walk-through covers the visual inspection routine that pairs with post checks each year.
Getting these steps right the first time is the most cost-effective decision you can make on a wood fence project in Abilene. If you would rather have experienced hands handle the entire installation, our Wood Fence Installation service covers site evaluation, post setting, panel installation, and finish work throughout the Taylor County area.
